
I was broke. I had an ultra-budget Chromebook—the kind of machine that makes you question your life choices every time you open a browser. I knew Linux was the answer. Everyone said so.
“Try Lubuntu, it’s lightweight!”
“Xubuntu runs on anything!”
“MX Linux is super light!”
So I tried them. All of them.
Lubuntu? 400MB+ RAM on idle.
Xubuntu? Even worse.
MX Linux? Don’t get me started.
These distros market themselves as “lightweight,” but when you’re running a Chromebook with 2GB RAM, 400MB on idle is NOT lightweight. That’s a lie.
Test Read in between
I spent months distro-hopping. Peppermint, antiX, Bodhi, Puppy Linux—you name it, I installed it. Some were better, some were worse, but none gave me what I actually needed: a functional desktop that doesn’t eat my RAM for breakfast.
So I stopped searching.
I started building.
The Result: 167MB RAM With a Fully Functional GUI
After weeks of tweaking, testing, and breaking things (many, many times), I did it.
A Debian-based system running (Auto Setup Script):
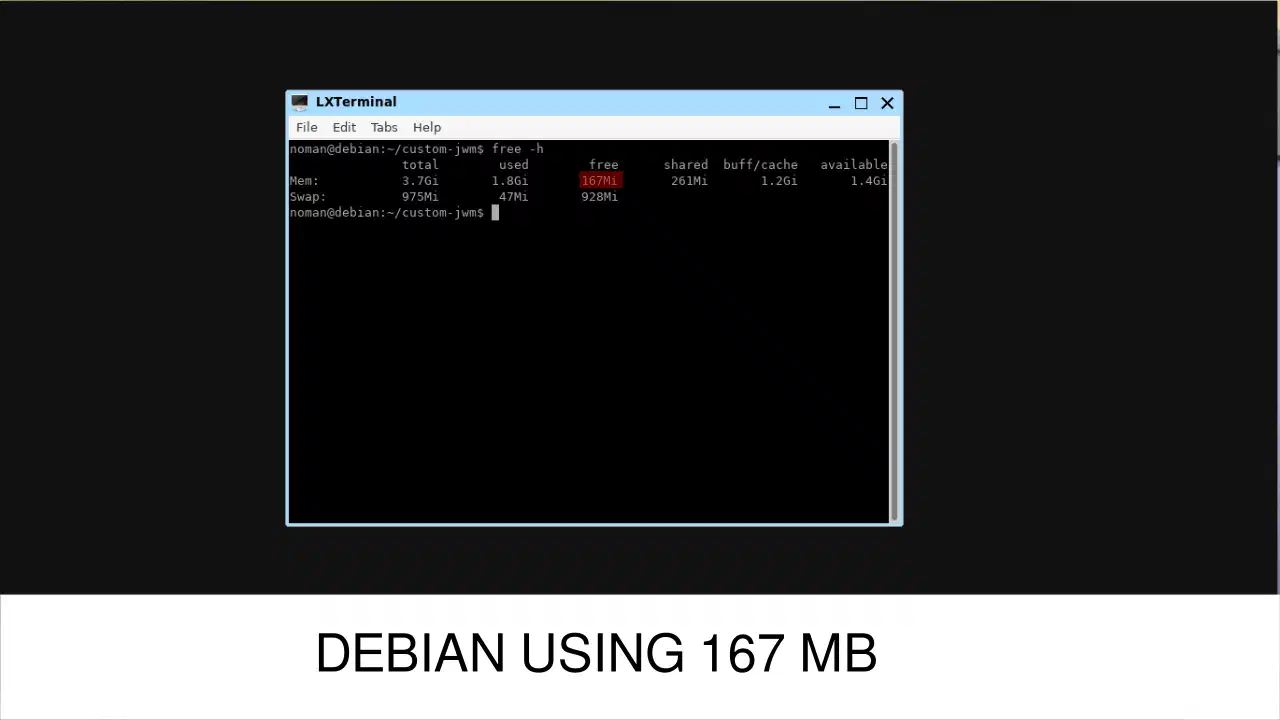
Total RAM usage: 167MB on idle.
Not 400MB. Not 300MB. 167MB.
And the best part? I packaged everything into a single script so YOU can have the same setup in under 10 minutes.
How I Built It (And How You Can Too)
Disclaimer: This guide is intended for users who are comfortable working with Linux at a system level. If you have only one machine, it is strongly recommended to test this setup inside a virtual machine first. We are not responsible for any personal data loss. Always take full backups before making system changes.
Step 1: Start With Nothing
Forget Ubuntu. Forget Linux Mint. We’re going barebones.
Download the Debian netinst.iso from the official website:
👉 https://www.debian.org/distrib/netinst
Make sure to download ISO for your system x86 or Arm. This is a minimal installer—around 400MB. It downloads only what you need during installation.
Step 2: Install Debian (But Skip Everything)
Boot into the installer and go through the normal setup:
HERE’S THE IMPORTANT PART:
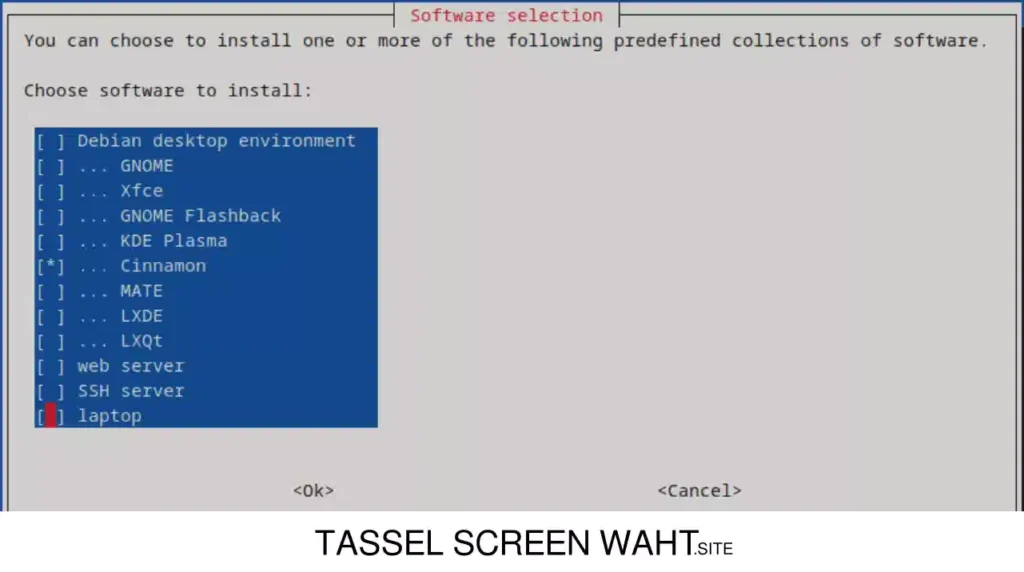
When you reach the tasksel screen (Software Selection), you’ll see options like:
UNCHECK EVERYTHING.
Yes, everything. Even “standard system utilities” if you want to go ultra-minimal (though I recommend keeping it).
We don’t want any of this bloat. We’re going to install exactly what we need—nothing more.
Finish the installation and reboot.
Step 3: Welcome to the Void (TTY Shell)
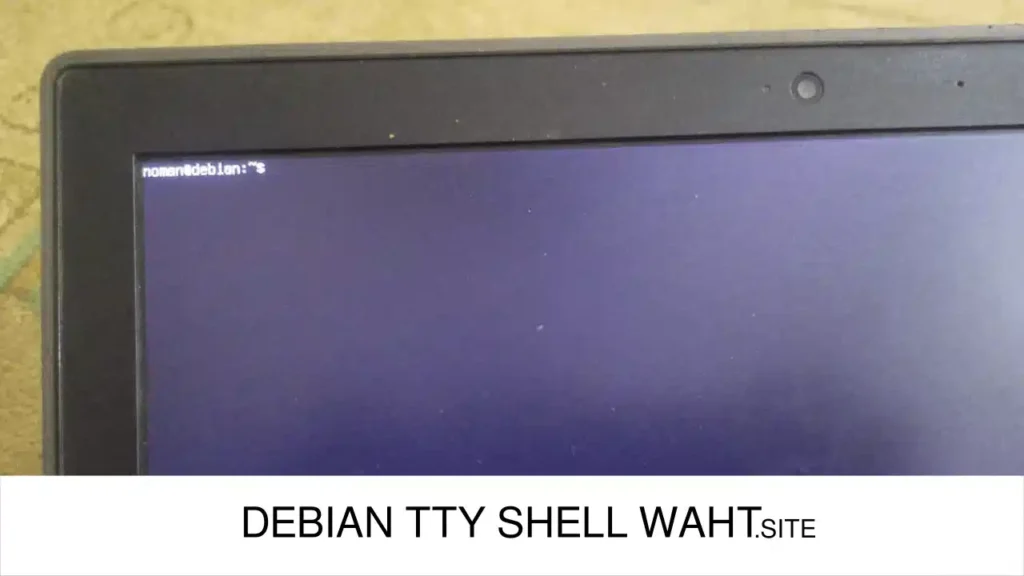
After reboot, you’ll see this:
Debian GNU/Linux 12 yourhostname tty1

yourhostname login: _
Don’t panic. This is exactly what we want. Log in with your username and password.
Step 4: Install Git and Clone My Script
First, we need git and sudo:
After login into you account that you setup while Debian installion. Then run these command one by one:
su

apt update

apt install git sudo -y

usermod -aG sudo yourusername

exit
Log out and log back in for sudo to work:
exitThen log in again and run:
sudo apt install git -y

git clone https://github.com/growty/custom-jwm

cd custom-jwm
You can download custom-jwm folder zip here.
Step 5: Run The Magic Script
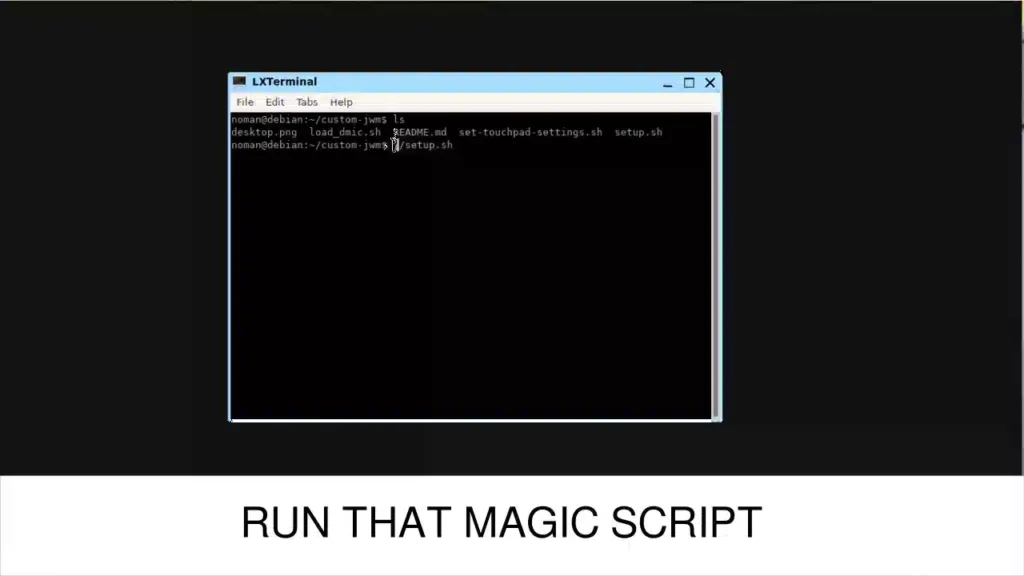
This is where everything comes together:
chmod +x setup.sh

./setup.sh
Go grab a coffee.
The script will automatically install and configure:
JWM
Ultra-lightweight window manager
LXPanel
Ultra-lightweight Panel With Tray
Blueman
Bluetooth manager
Brightnessctl
Backlight control
JWM Keybinding
Volume control
Explain of Script
If you go to custom-jwm folder you will see these files
noman@debian:~$ ls

.fehbg.sh

.jwmrc

desktop.png

set-touchpad-settings.sh

setup.sh

README.md
When you will run ./setup.sh this will copy .fehbg.sh, .jwmrc, set-touchpad-settings.sh into /home/USER/ and it will copy desktop.png to home/USER/.wallpapers. /.wallpapers folder will be created. That,s it.
Step 6: Reboot and Enjoy
sudo rebootOnce reboot you will see tty again something like this:
Debian GNU/Linux 12 yourhostname tty1

yourhostname login: _
Just type your username and password and then type startx. When your system comes back up, you’ll be greeted with a clean, minimal, lightning-fast desktop.
To save resources we have not added any login manager but if you want you can by running this command.
sudo apt install lxdmAfter that reboot you will see login screen.
Check your RAM usage:
free -h
You should see something around 167MB used.
That’s not a typo. That’s real.
Customization: Setting Your Wallpaper
Want to change the wallpaper? Easy.
Your wallpaper is controlled by a script at ~/.fehbg.sh
Open it:
nano ~/.fehbg.sh
You’ll see something like:
feh --no-fehbg --bg-scale '/home/noman/.wallpapers/nature.jpg'
Replace the path with your own image:
feh --no-fehbg --bg-scale '/home/yourusername/Pictures/your-wallpaper.jpg'
Save (Ctrl+O, Enter) and exit (Ctrl+X).
Run the script or reboot to see your new wallpaper:
~/.fehbg.shWhy This Matters
This isn’t about being a minimalist for the sake of it.
This is about:
Every megabyte matters when you only have 2GB.
Leave a Comment